How to Level Your RV: A Step-by-Step Guide for Comfort and Safety
Introduction
Leveling your RV isn’t just about comfort—it’s a critical step to protect your rig’s systems and ensure everything works as it should. A tilted RV can strain appliances, damage plumbing, and even trick your black water tank into signaling a false “full” warning. Worse, improper leveling can lead to sewage backup or uneven tire wear. Whether you’re a weekend warrior or a full-time RVer, mastering RV leveling is non-negotiable. Here’s your ultimate guide to getting it right.
Why Leveling Your RV Matters
-
Protect Your RV’s Systems
- Appliances like refrigerators and air conditioners rely on gravity and level surfaces to function properly. A tilted RV can cause coolant failure in fridges or uneven cooling from AC units.
- Black and gray water tanks depend on proper angles to drain efficiently. An unlevel RV may trigger false “tank full” alerts or leave waste trapped in pipes.
-
Avoid Structural Damage
- Uneven weight distribution stresses door frames, cabinets, and the chassis, accelerating wear and tear.
- Tires on sloped surfaces can develop uneven tread wear, shortening their lifespan.
-
Comfort
- Nobody wants to sleep, cook, or relax in a crooked space. Leveling ensures your RV feels like home.
How to Level Your RV: Step-by-Step
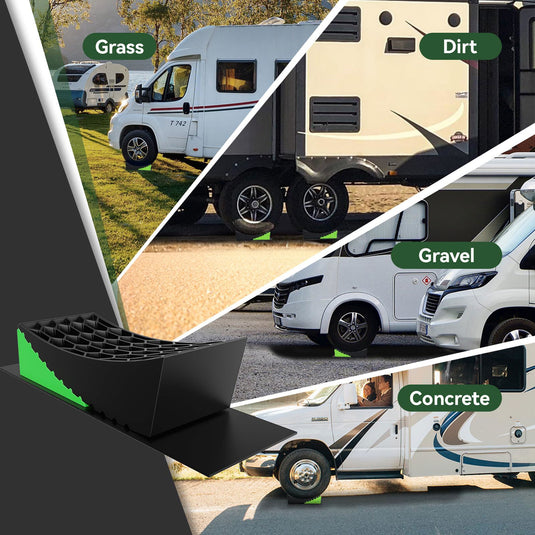
Step 1: Choose a Stable, Flat Surface
- Avoid icy, slippery, or soft ground. Clear the area of rocks, branches, or debris that could interfere with leveling.
Step 2: Use the Right Tools
-
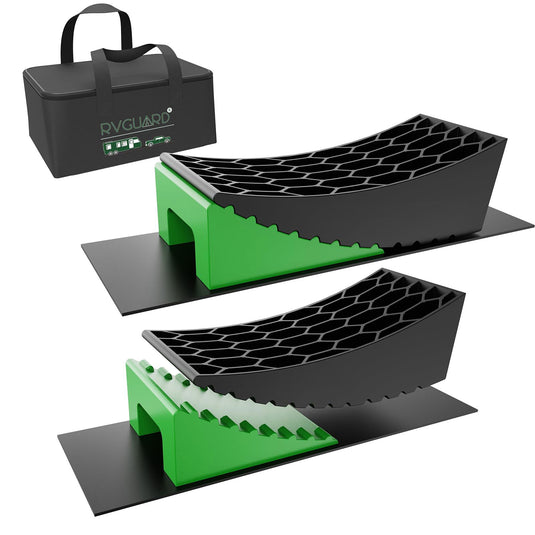
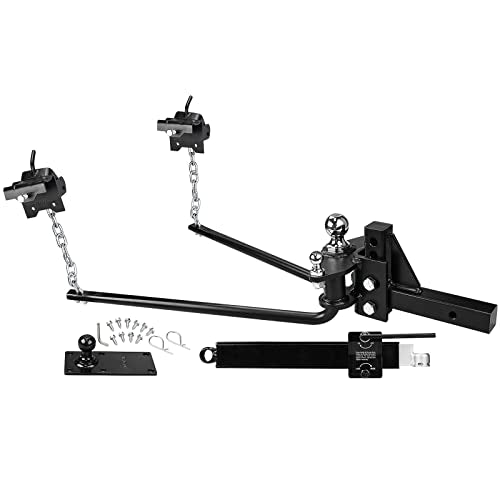
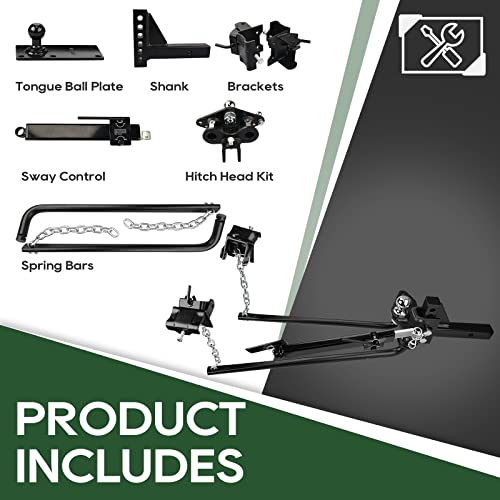
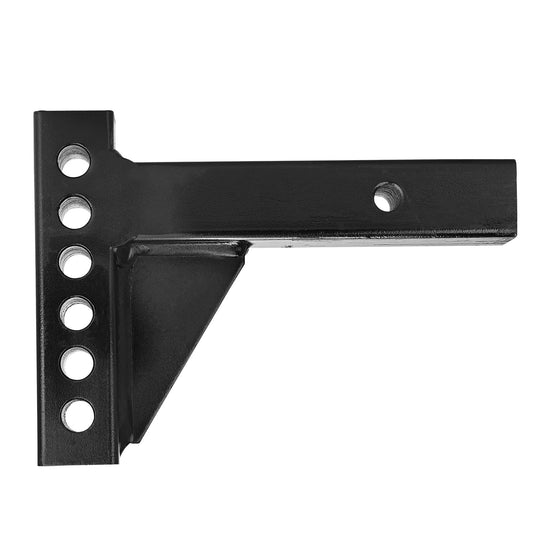
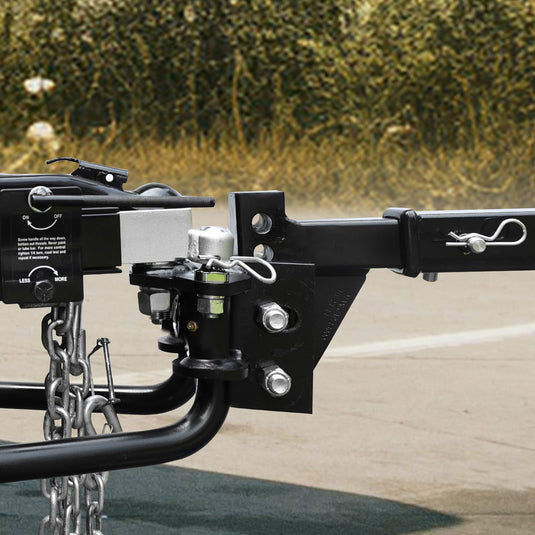
Electric Leveling Systems
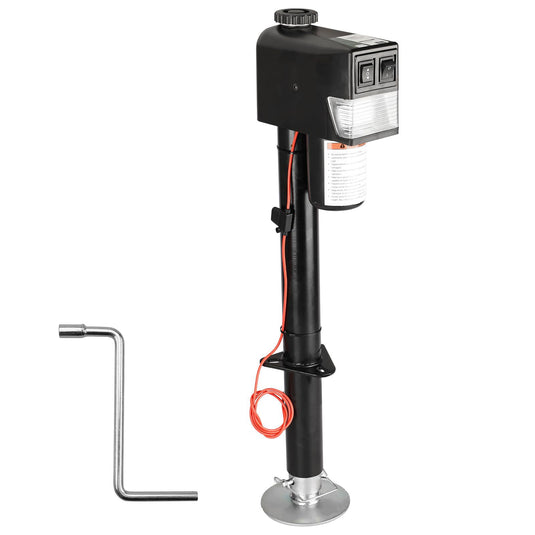
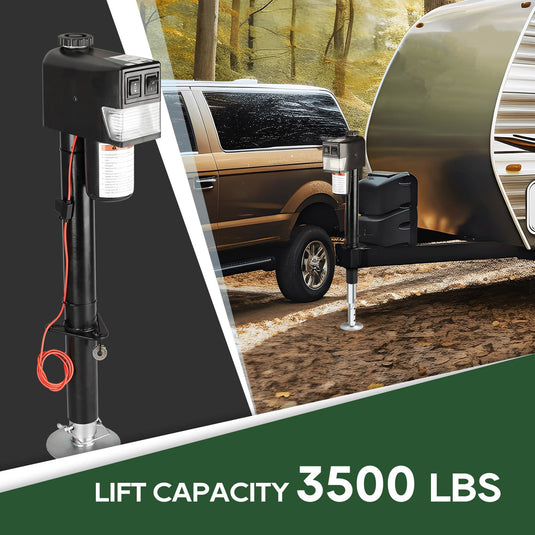
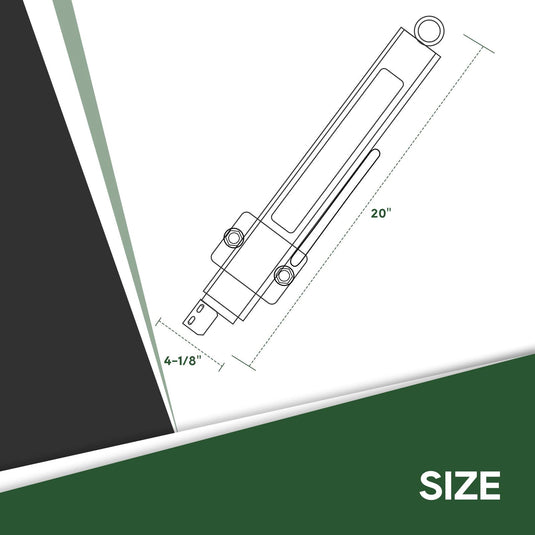
- Hydraulic jacks automatically adjust your RV’s height. For enhanced convenience, pair with an Electric Power Tongue Jack – its 18" lift range and LED light make setup effortless, even in low-light conditions.
-
Pro Tip:
"I use the RVGUARD electric jack with my hydraulic system. The manual crank backup saved me during a power outage last winter!"
– Sarah M., Full-Time RVer
-
Manual Leveling
-
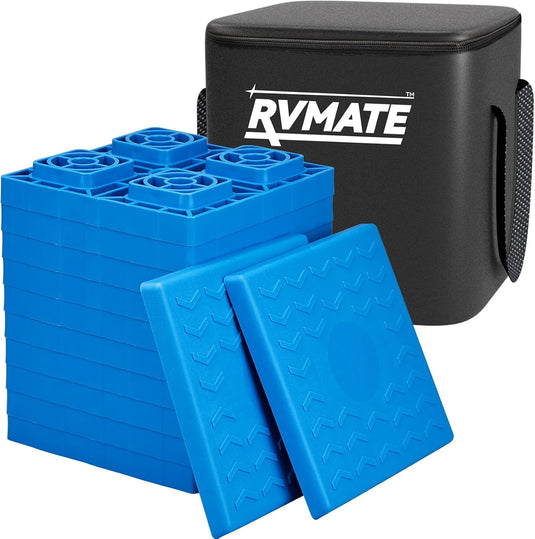
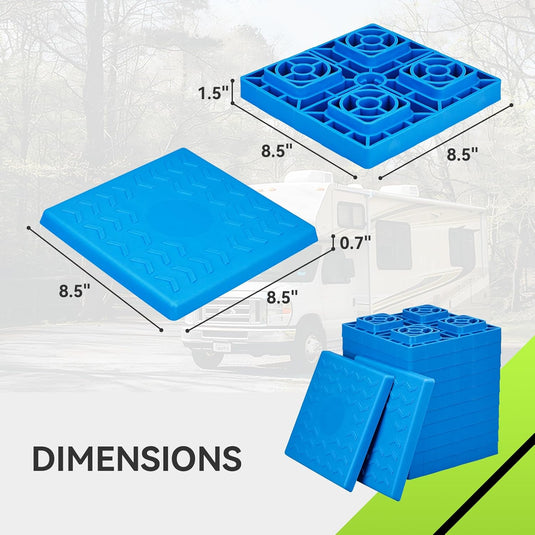
Camper Levelers with Anti-Slip Mats
- Easy, Precise Adjustments: Drive onto the camper leveling system to raise your RV gradually (1/2” to 4” increments) in under 5 minutes—no guesswork required.
- Heavy-Duty Design: Made of high-density polyethylene, these support up to 35,000 lbs and fit wheels up to 32” in diameter.
- Anti-Slip Safety: Curved levelers and wheel chocks with grip mats prevent slippage, even on uneven terrain.
-
Compact Storage: Includes two levelers, two chocks, two mats, and a carrying bag—no messy stacking!

-
When tackling tough terrain, an Electric Power Tongue Jack like the RVGUARD 3500LB model is a game-changer:
- 3500LB Capacity: Handles heavy trailers with dual-tube steel construction.
- Smart LED Lighting: See jack positioning clearly during night setups.
- Power+Manual Modes: Battery-operated with emergency crank handle.
Real-World Use Case:
"Installed this on my Airstream – the 18" lift made leveling on rocky campsites 50% faster. Love the corrosion-resistant coating for beach trips!"
– Mike T., Adventure Van Owner
-
Step 3: Level Side-to-Side First
- Place leveling blocks (or drive onto ramps) under the tires on the low side.
- Monitor your RV leveling system progress with a bubble level or smartphone app.
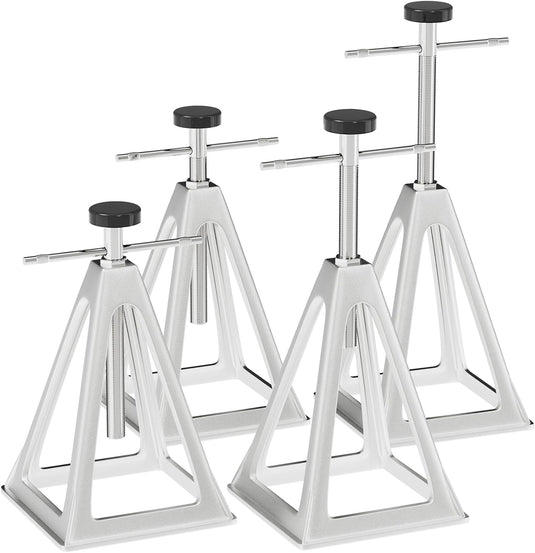
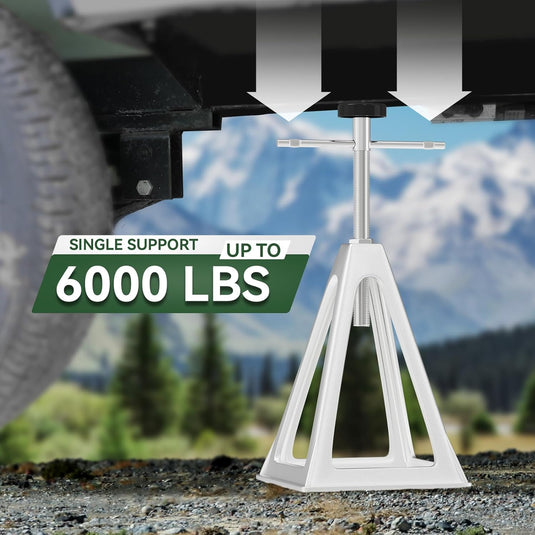
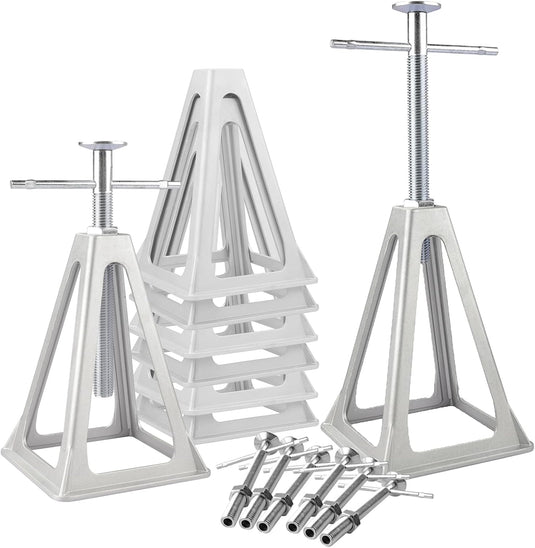
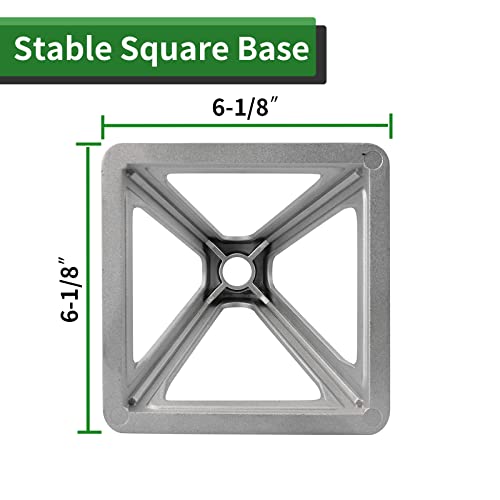
Step 4: Level Front-to-Back
- Fine-tune RV trailer leveling jacks until fully balanced.
How to Keep Your RV Stable After Leveling
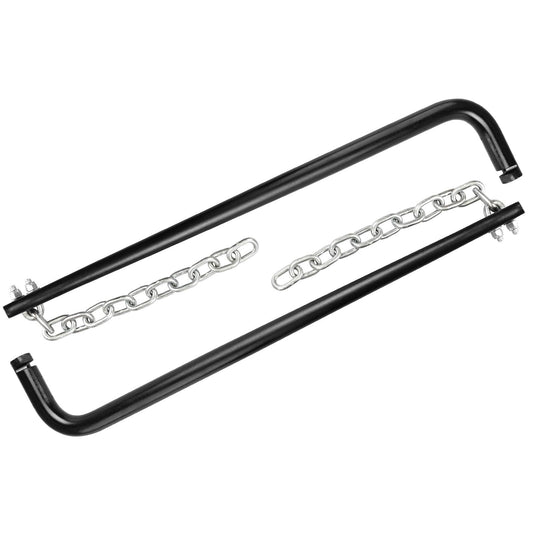
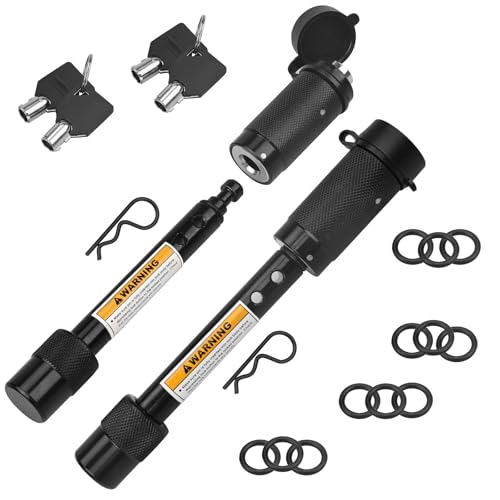
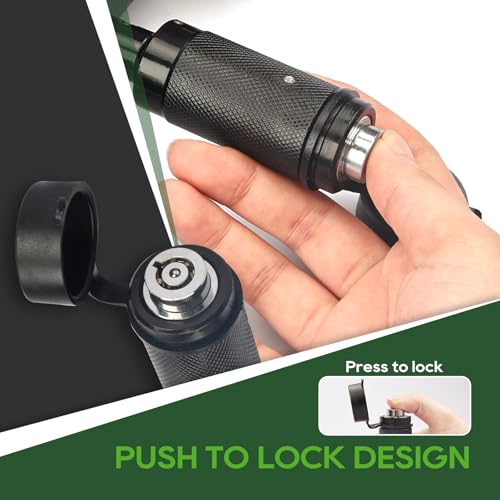
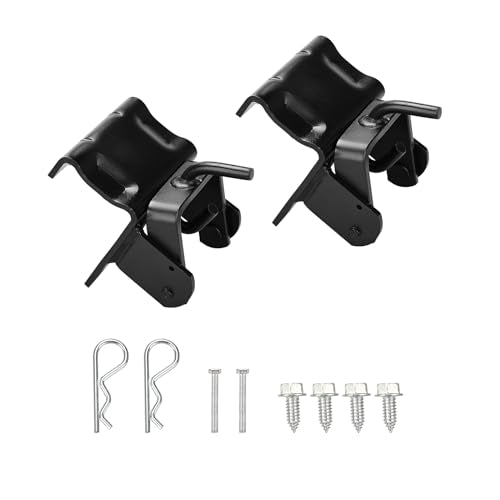
Once level, lock it in place with an RV Wheel Chock Stabilizer:
- Anti-Theft Design: Expandable from 4.8” to 11.8” to fit tandem tires. Locking holes prevent theft or accidental removal.
- Heavy-Duty Build: Zinc-coated iron resists rust, while raised ribs grip tires tightly.
- Easy Storage: Includes a handle, storage bag, ratchet wrench, and locks.
-
Pro Tip:
"The zinc-coated wheel chock stabilizer held strong during a Midwest storm – no slippage even with 50mph winds!"
– The Johnson Family (@WanderlustRVLife)Before vs After:
- ❌ Used to spend 20+ minutes leveling with basic blocks
- ✅ Now my RVGUARD electric jack + camper levelers get it done in 5 minutes flat
– @NomadEngineer YouTube Review

Final Tips for a Stress-Free Setup
- Always double-check leveling with a tool—never rely on “eyeballing” it.
- Test appliances and plumbing after leveling to ensure they’re working properly.
- Keep camper levelers and RV stabilizers in your quick-access storage bay.
Conclusion
Leveling your RV isn’t just a chore—it’s an investment in your rig’s longevity and your own comfort. With tools like Camper Levelers and Wheel Chock Stabilizers, the process is faster, safer, and hassle-free. Ready to say goodbye to crooked countertops and finicky fridges? Whether you're prepping for spring RV adventures or winter boondocking, reliable camping trailer leveling jacks adapt to all conditions.
Need reliable leveling tools?
Check out our top-rated Leveler Collection for a perfectly level and stress-free trip! Enjoy free shipping on orders over $60 and a 10% discount for new customers with code RG10.
Click here to place your order and use the discount automatically →
Explore Related Products